Step by Step Tutorial of How to make your own Hatblock.
How to make your own hat block using household items

Sometimes, especially during lock-down you have to figure out how to work with what you've got.....
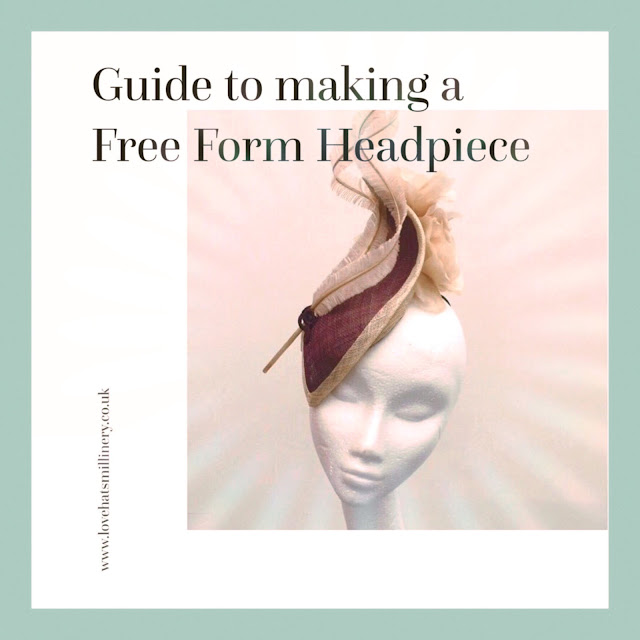
In this tutorial I will give you a step by step guide of how to make the hat block that I used to make this Headpiece using household items.

What you will need:
- Metal Cooking Wok/Or any other shape you would like!
- Expandable Builders Foam
- Plastic Bag or Cling Film
- Small Wood Saw
- Rough Sand Paper
- Newspaper torn into strips
- PVA Glue
- Water
- Mixing Bowl
- Paintbrush
When you are ready to start.....
- Begin by first covering your work surface to protect from any over spill.
- Line the inside of your wok (or any other shape you would like to use) with plastic or cling film.
- Spray the builders foam into the Wok so that it reaches the top (it will expand and no doubt come over the top, but don't worry that's what its supposed to do!)
- Leave for 24 hours to ensure it's fully dry.
- When it is completely dry, remove from the Wok.
- Use a wood saw to cut the top off straight across.


Your block will now look something like the one above!
8. Next is to papier-mache the whole block, you can fill in any dents or holes that have occurred.
9. Mix 2 parts PVA glue to 1 part water, then use a paintbrush to apply the PVA mixture to both sides of your newspaper strips and then lay them onto the foam block.
10. Keep adding strips of PVA soaked newspaper until the foam block is covered with a few layers.
11. Leave to dry for at least 24/48 hours until it is dry and hard!
12. Make sure the foam block is completely dry and then cover with cling film and you're ready to start blocking!! YAHHH


HAPPY BLOCKING.....
I hope you have enjoyed this tutorial, please subscribe to my blog to get more tips and tricks and in my next blog I will tell you how I actually created this Headpiece!


Comments
Post a Comment